Welcome to the admin documentation page for Thousand Trails resort/campground QR code landing pages. I strongly suggest looking through the user guide first for some basic background on using the new WordPress Gutenberg editor.
Logging In
To log in to your WordPress site, follow these simple steps:
Access the Login Page: Open your web browser and type in the URL of your WordPress website. Append "/wp-admin" to the end of the URL (e.g., www.yourwebsite.com/wp-admin). Press Enter.
Enter Your Credentials: You'll be directed to the WordPress login page. Here, you'll need to enter your username and password. These credentials are typically provided to you when your account is created, or you can obtain them from your website administrator.
Click 'Log In': After entering your username and password, click the "Log In" button. If your credentials are correct, you will be granted access to the WordPress dashboard, where you can manage and update your website's content.
It's important to keep your login credentials safe and confidential to prevent unauthorized access to your site. If you forget your password, you can typically use the "Lost your password?" link on the login page to reset it.
The Website Dashboard
When logged in, you will see the familiar dashboard of the administrator panel.
Creating a Resort Page
Overview
Resort pages utilize a new WordPress Gutenberg editor feature called Patterns. Patterns are saved blocks that help you quickly re-create commonly used blocks.
To get started, go to Pages from the menu and click Add New.
Adding Content
By going through the user guide you should have a basic understanding of blocks. As mentioned previously, patterns are saved blocks, and that's what we'll be using to set up the structure of the resort page.
First, Click the blue plus icon in the editor. From the menu that pops up, click Browse All, then choose Patterns, and scroll down to Resort Blocks.
From here you can click to insert these blocks. All are used, except the first one which is a blank card. This can be used for extra content, however. Simply start with the bottom (last) block, click to insert, then move up the list. The page will be laid out in the correct order. See the video demonstration below.
These pattern blocks hold example text. Simply update the copy to include the correct text and Save/Publish your changes.
Page & Post Restriction
In order to keep resort admins from editing any other resorts' content by accident, we are utilizing a plugin called Page Restriction. This way we can lock down accounts to only have access to the pages we want. In this section we'll walk through creating a role to go with our resort user.
Roles
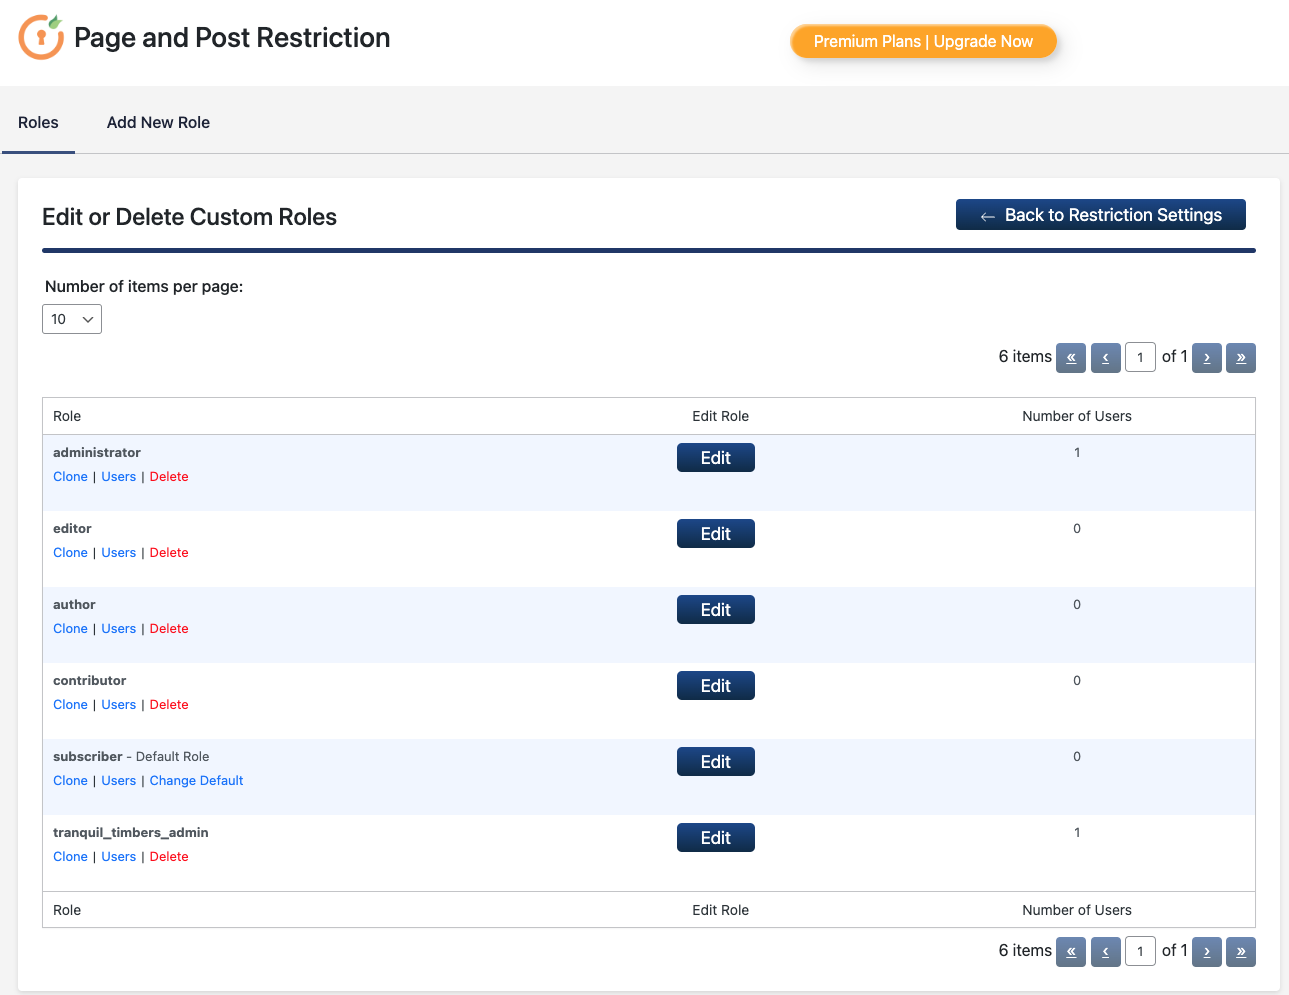
To access the plugin, click Page Restriction from the sidebar navigation. Once open, click Roles and Capabilities from the top menu. You should see a list of all current user roles on the site.
Cloning
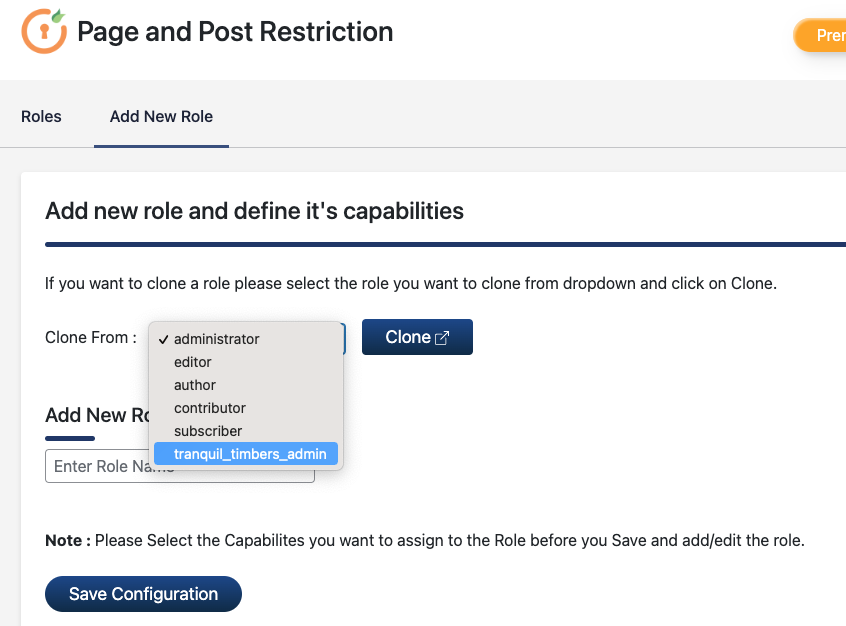
To create a role with all of the proper permissions, we are going to clone one of the existing resort admin roles. Under any resort role (ex: forest_lake_admin), click the Clone button. On the next screen, enter the name of your new resort under Add New Roles. Use underscores for spaces and follow the naming convention of resort_name_admin. Click Save Configuration.
Page Access
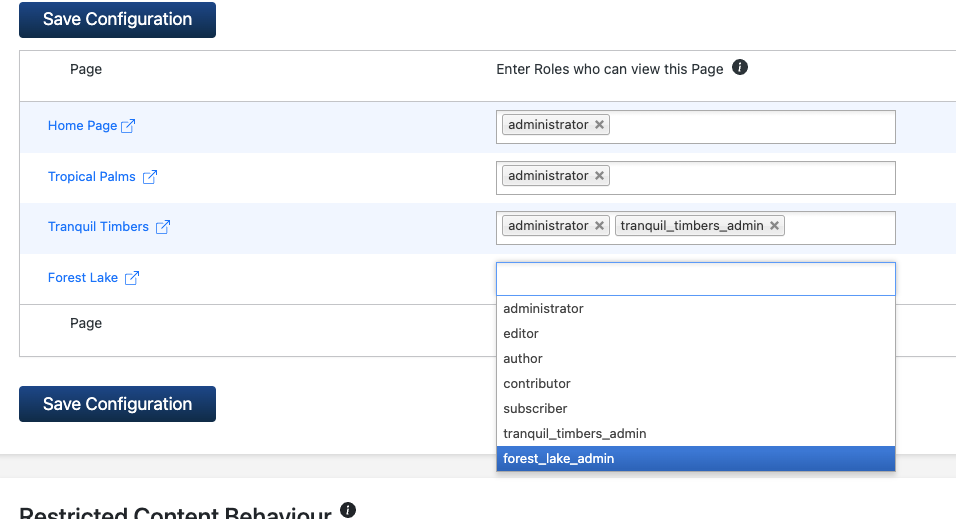
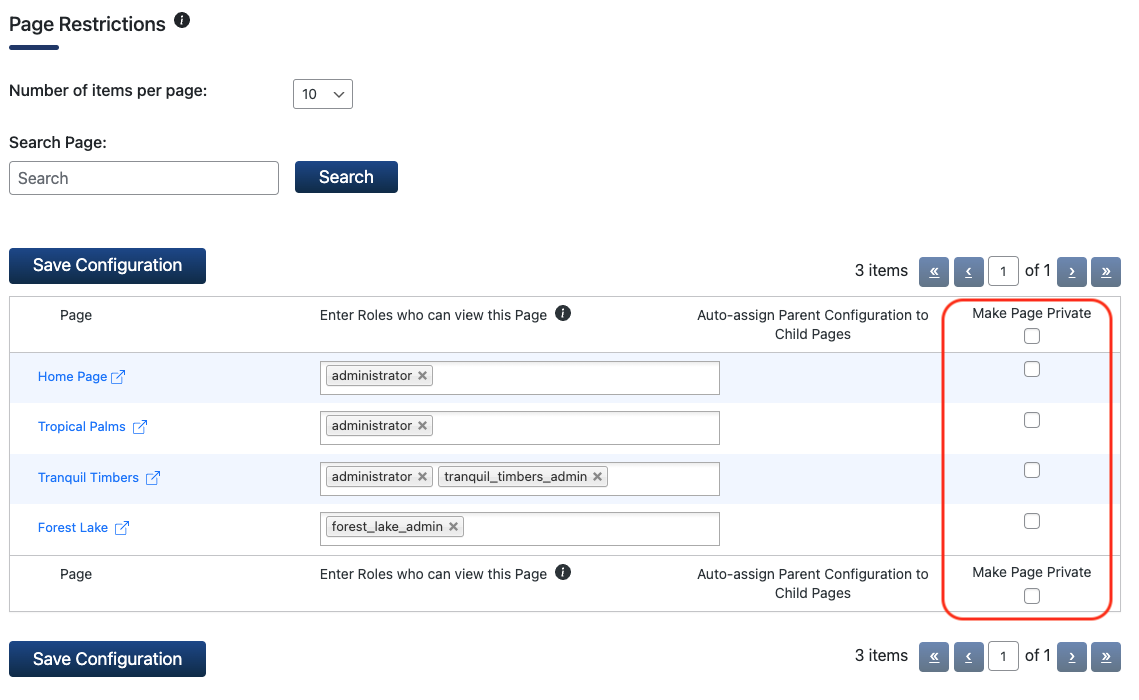
Go back to the Page Restriction dashboard by clicking the name of the plugin from the lefthand menu. By default we are shown the Page Access panel, which shows a list of all pages and who has access to edit them. Find your new resort page, and in the 'Enter Roles who can view this Page' column, select the new role you just created. Make sure administrator remains.
A note on the 'Private' flag
At the Page Access panel, you will see the last column has a label of 'Make Page Private'. When checked, this means only the groups selected in the list can view the page in a logged-in state. Make sure these are always left unchecked for all resorts.
Creating a New User
Next we need to create a new user who will have access to the resort page we just created.
Add New User
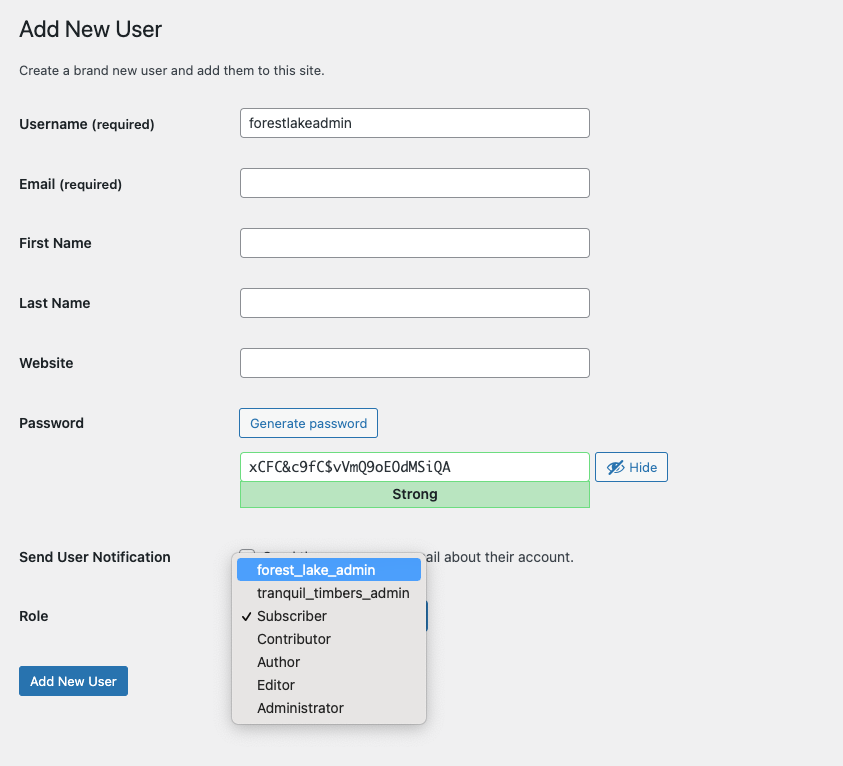
From the Users menu in the lefthand navigation, select Add New. Fill out the user name and email address, and keep the 'Send User Notification' option checked. Lastly, and most importantly, choose the correct role for the user from the Role dropdown menu.
Set the New Admin as Page Author
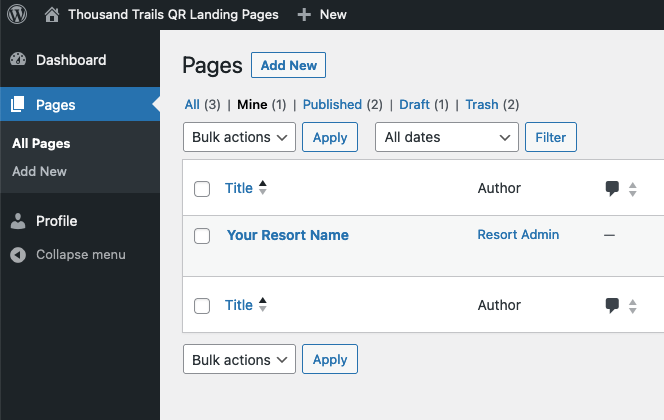
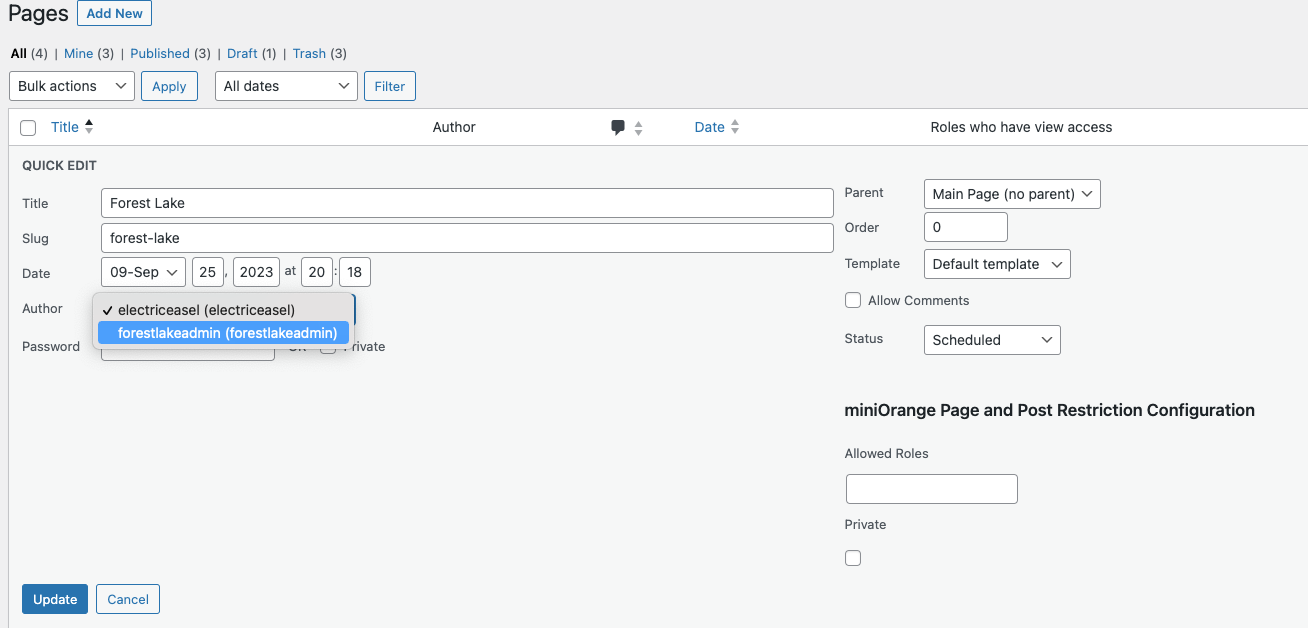
In order to get this to work, the new user we just created needs to be the author of the resort page we created. Go back to Pages, then hover over the resort page name and choose 'Quick Edit' and set the user as the author, and save/update.
Lastly, double check page roles and ensure all pages are NOT set to private.