
Introduction Last updated: 2023-09-19
Welcome to the documentation page for Thousand Trails resort/campground QR code landing pages. This can be followed section-by-section, or you can use the sidebar to navigate to the relevant section.
Welcome to the documentation page for Thousand Trails resort/campground QR code landing pages. This can be followed section-by-section, or you can use the sidebar to navigate to the relevant section.
To log in to your WordPress site, follow these simple steps:
It's important to keep your login credentials safe and confidential to prevent unauthorized access to your site. If you forget your password, you can typically use the "Lost your password?" link on the login page to reset it.
When logged in, you will see the dashboard of the administrator panel. On the left is the sidebar with a few items you can access: Dashboard, Pages, and Profile.
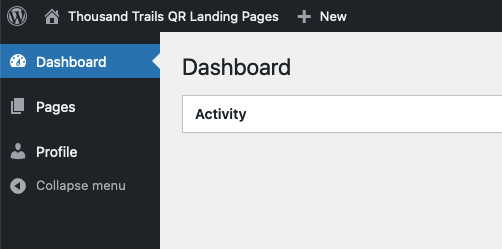
From the sidebar, click the 'Pages' menu item and you will be taken to a new screen that lists your website. It appears here as an editable page.
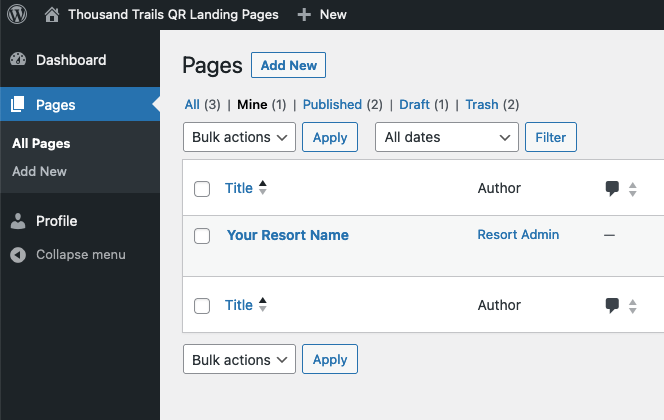
In the new version of WordPress, you no longer have to edit a page's content in a little window, clicking icons for headings or bold text like you would in a word processor. Instead, their new editor uses elements called blocks, which can be any number of element types. In addition, you get to edit the page as you would see it as a visitor! This makes editing much more intuitive.
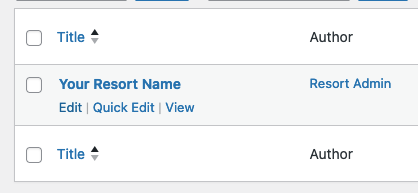
To edit your page, click on your resort/campground name, or hover over it and click the edit link as seen below:
Most content on your webpage can be edited here, but some cannot. Certain information, like the resort name, address, header logo (Thousand Trails or Encore), directions link in the header, park map, policies, and site footer cannot. Most of the uneditable content is pulled directly from RVOntheGo.com, and will need to be edited by the web team.
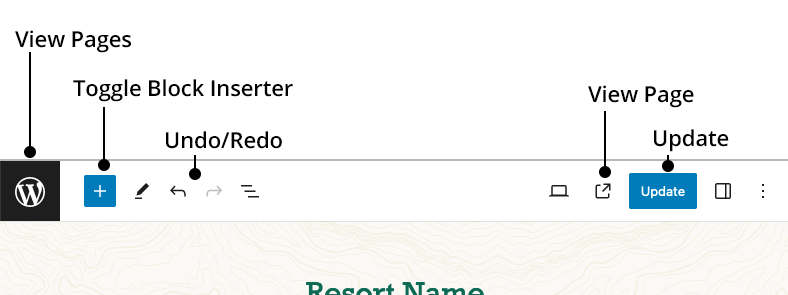
Let's very quickly go over the toolbar. We'll only go over the relevant tools to keep things simple.
As previously mentioned, the main editor looks just like you would expect to see your page online, with a few exceptions. You may see content we call shortcodes, wrapped in brackets [], that display information on the page when viewed on the website's URL. For example, [resort_title] will pull in the name of your resort/campground. All other content can be edited.
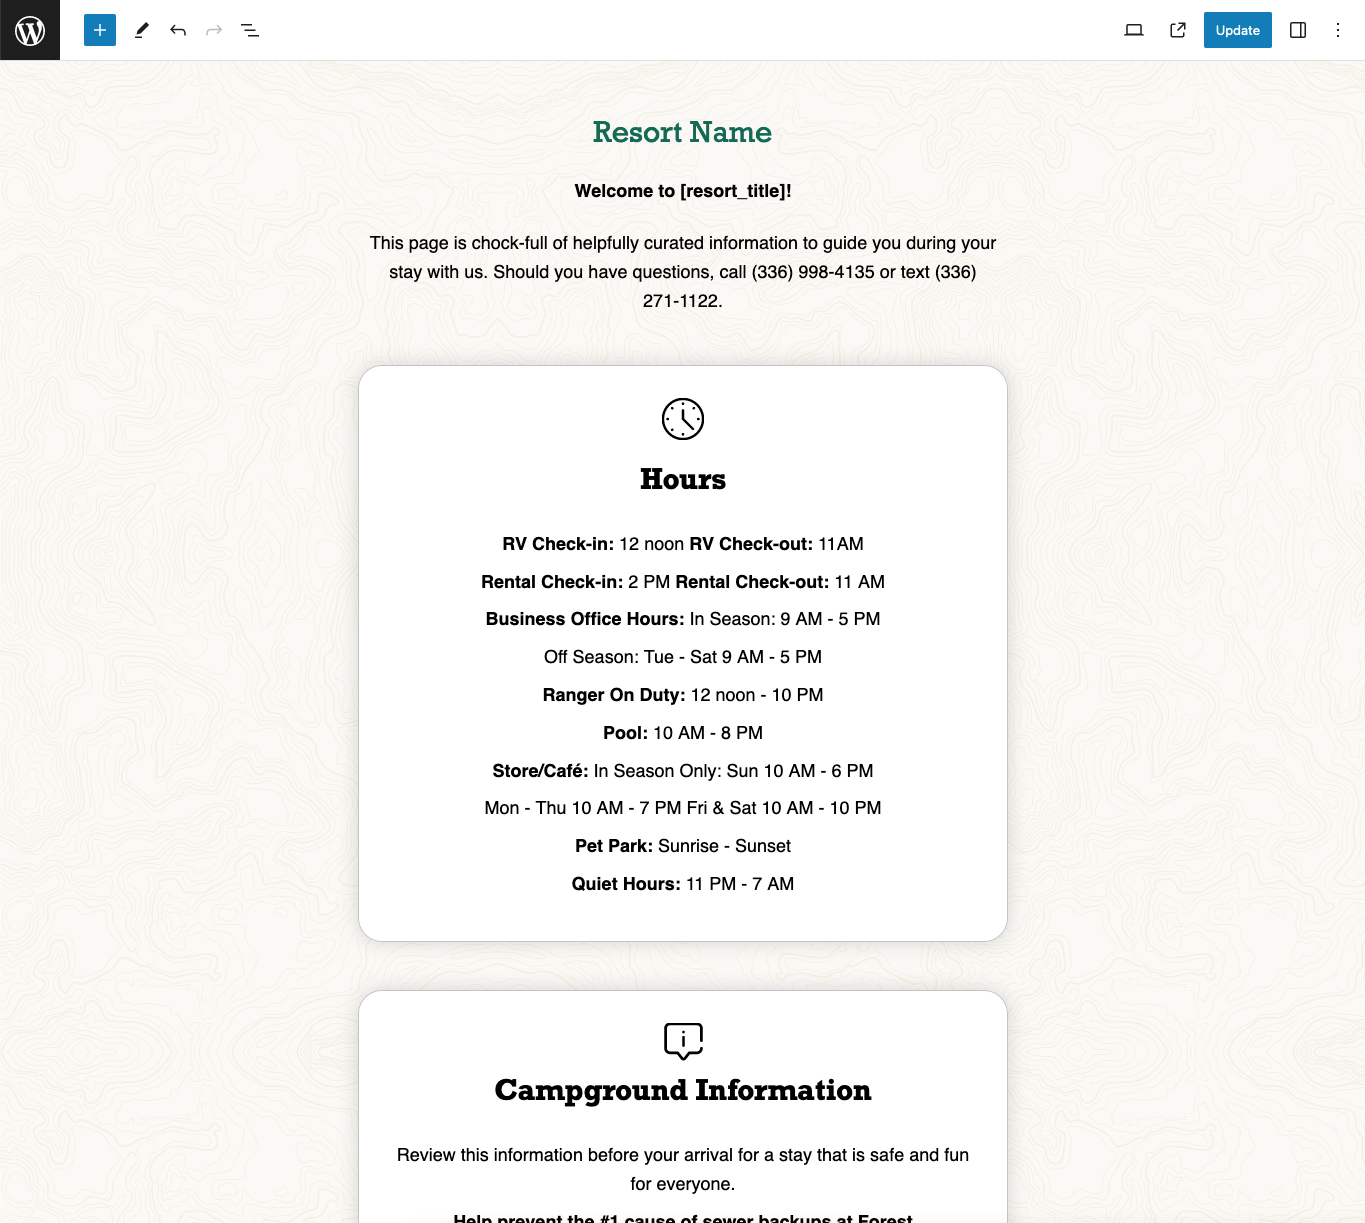
Simply put, blocks are pieces of content that can be dropped onto the page, moved around, or even grouped with other blocks. This includes things like paragraphs, lists, images. All of the content on the page is made with blocks.
To edit text of blocks, simply click and place your cursor where you'd like to edit, and start typing. This functions very much like a word processor.
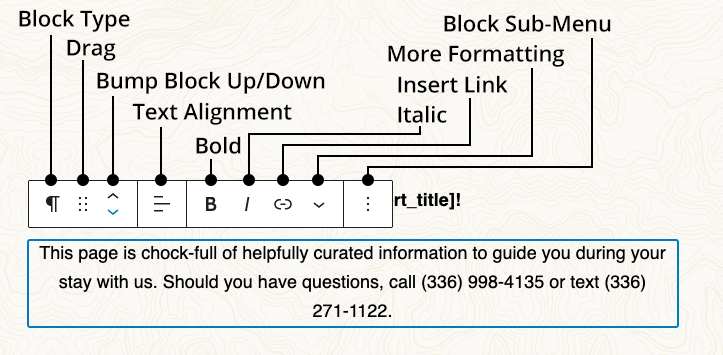
When you click on a text/paragraph block, a menu will appear above it:
In case you make changes you didn't mean to, you have some options:
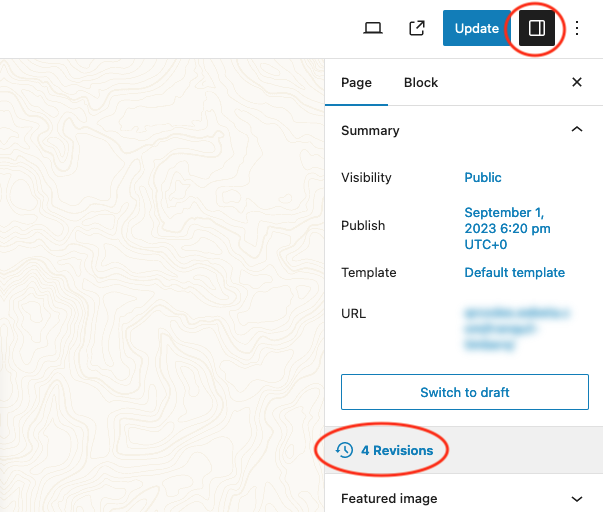
If you saved changes you did not intend to, fear not: WordPress keeps a history of your work. Simply click the Settings icon next to the blue Update button, then the Revisions menu item, as below:
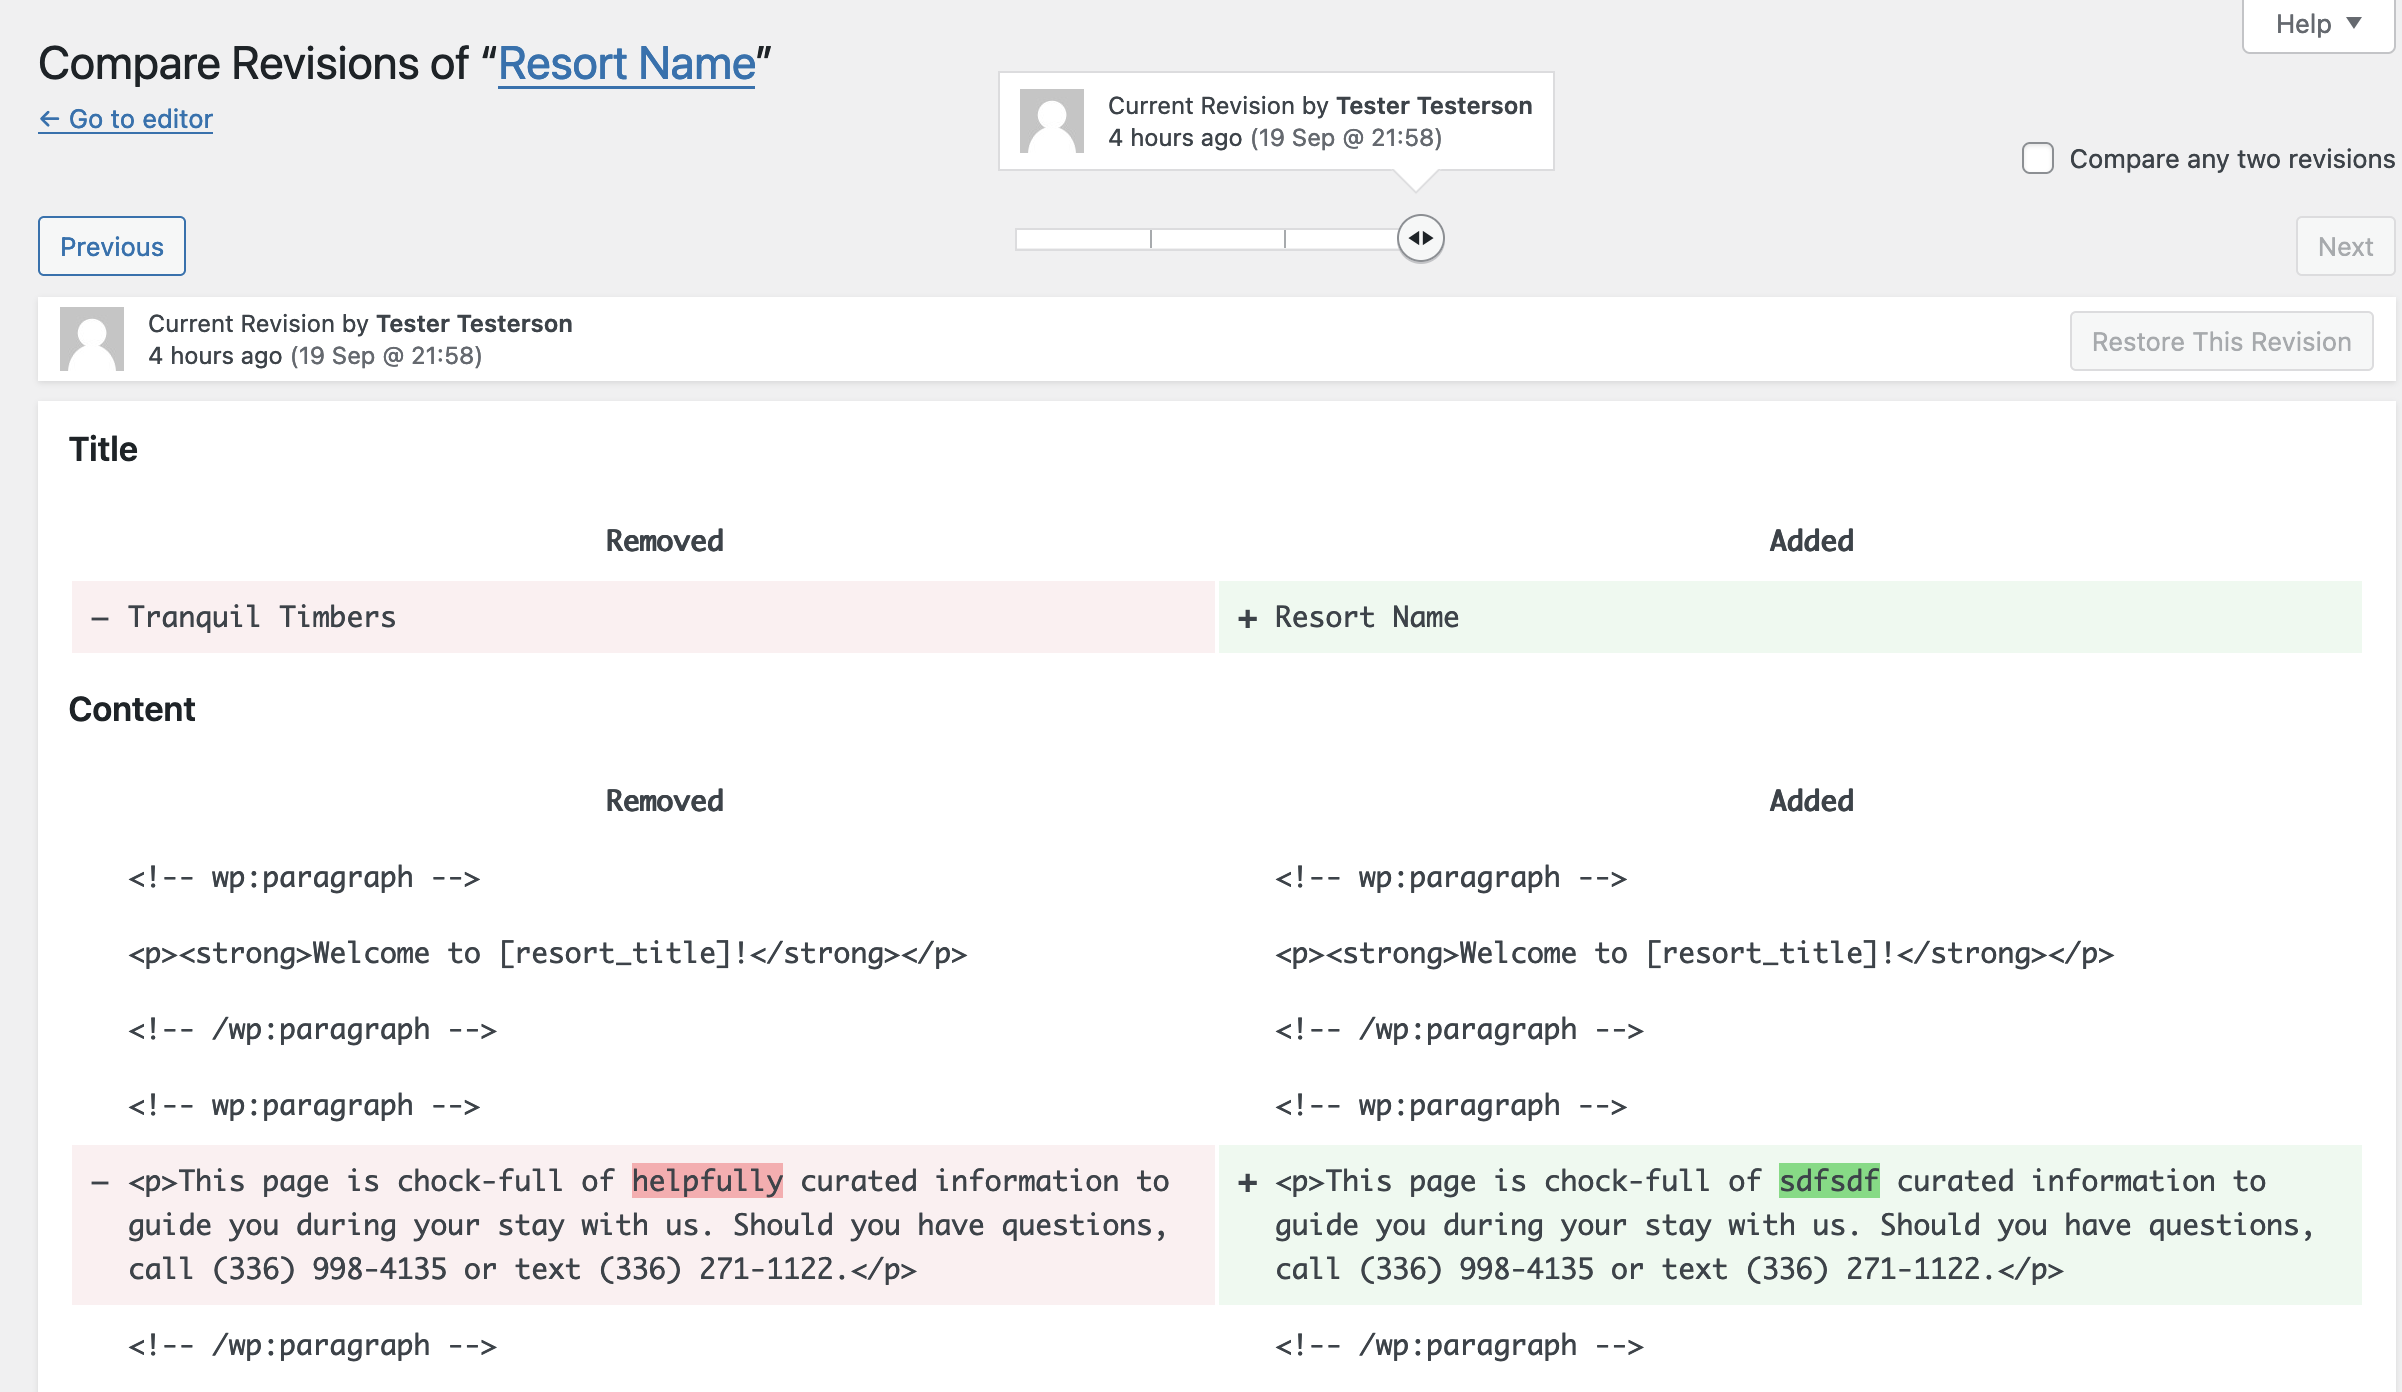
At the next screen you will be able to compare previous versions (below, left) with the latest changes (below, right). Content additions will be marked in dark green, and deletions will be marked in dark red. You can use the slider at the top of the page to go back in time to view even earlier versions of the page. To go back one version, move the slider one time to the left.
Once you are happy with the change, click the 'Restore This Version' button in the top right of the screen.
Once you are done editing, or would just like to visit your page to view it, you can do so via two easy methods:
If you are stuck and need help, you can reach out to Krystle for assistance.